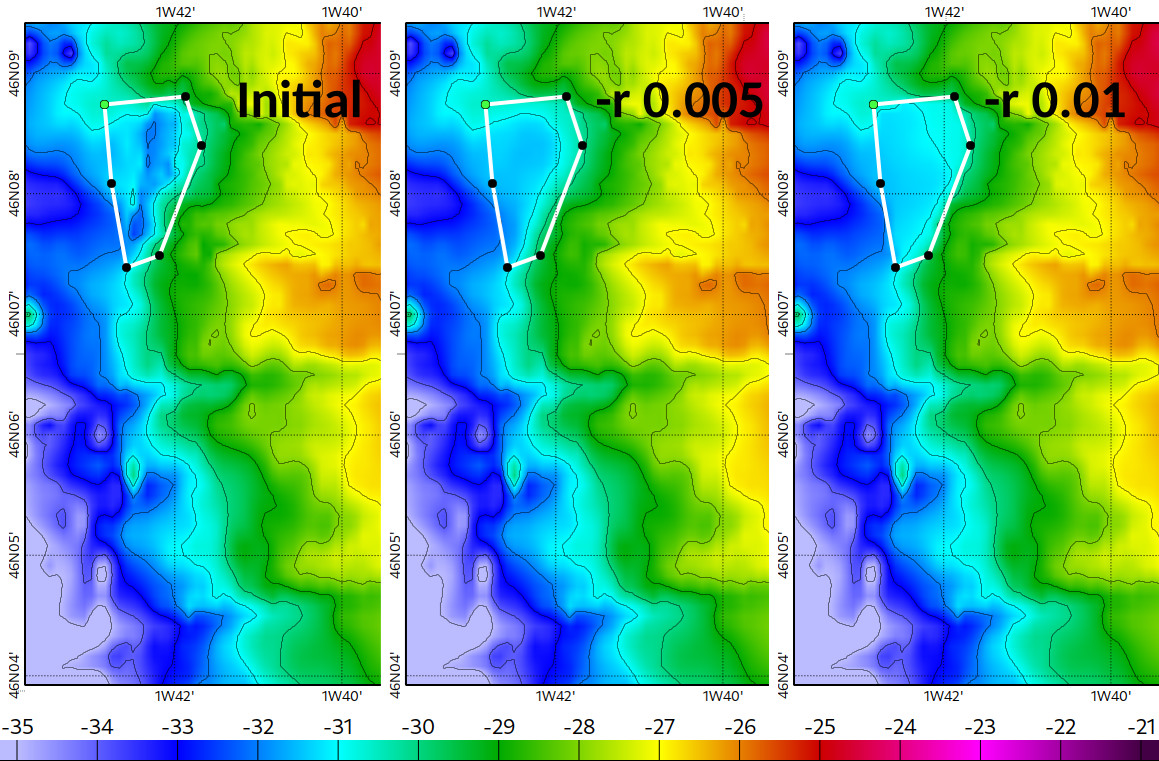
Smoothing
Integrating data of different types and from different sources can cause discontinuities in the bathymetry where these datasets are merged. To smooth out these discontinuities, we can use topo_smooth. In this case, we need to define a polygon defining the area needing smoothing. To do that, we can use pocvip and its edition tools.
Step 1: Create the polygons
First, create two files called “smooth_1.plg” and “smooth_2.plg” Next, open the GEBCO5arcs_MNTAtlSHOM_S202001000.nc file in the same view as “smooth_1_tuto.plg” and “smooth_2_tuto.plg”. You can see that there are slight discontinuities in the bathymetry where we integrated the xyz data.
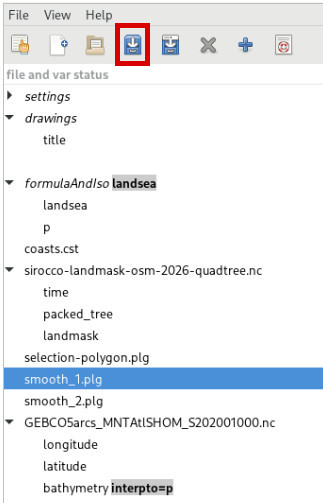
To define your own polygons, left-click on “smooth_1.plg” and then on “polygones edit”. An “edition toolbox” will appear.
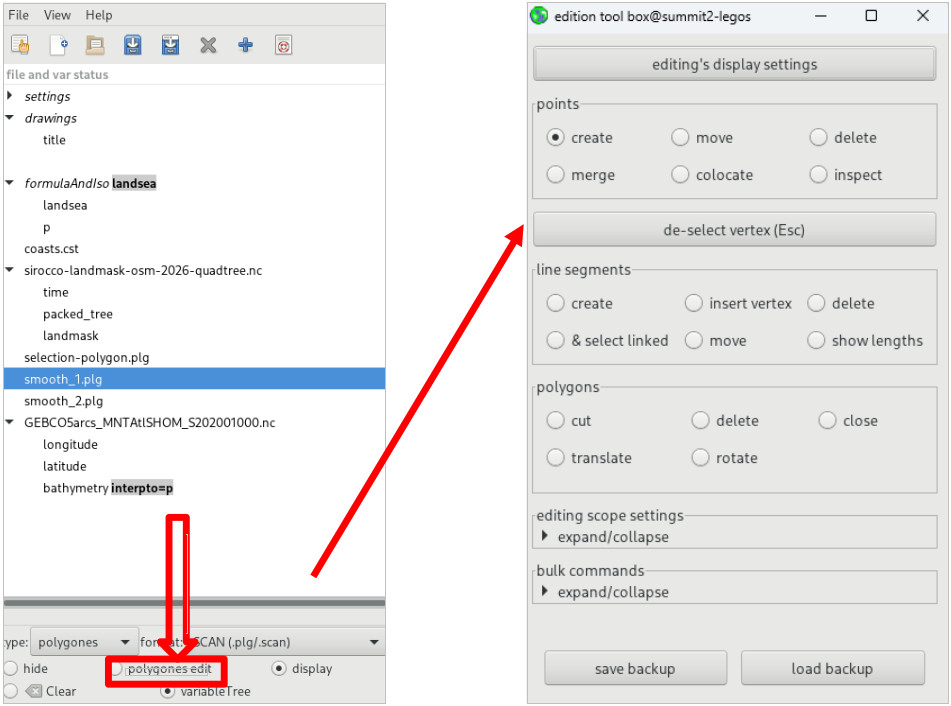
Select “create” in the “points” menu, and left-click in your view to create your polygon point by point. Try and follow the example of “smooth_1_tuto.plg”. You can also create a different polygon to test and see the difference.
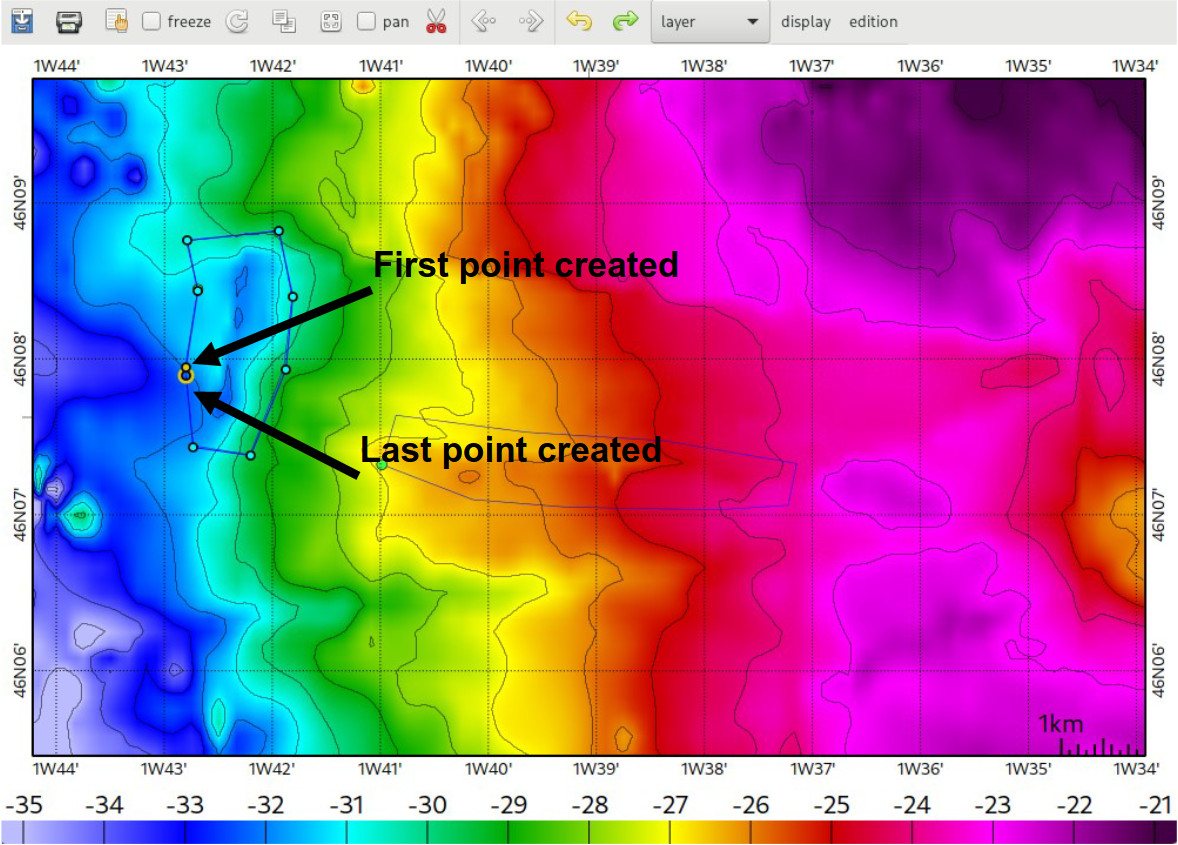
Once you created all your points for “smooth_1.plg”, you need to close the polygon. For that, click on “close” in the “polygons” menu.
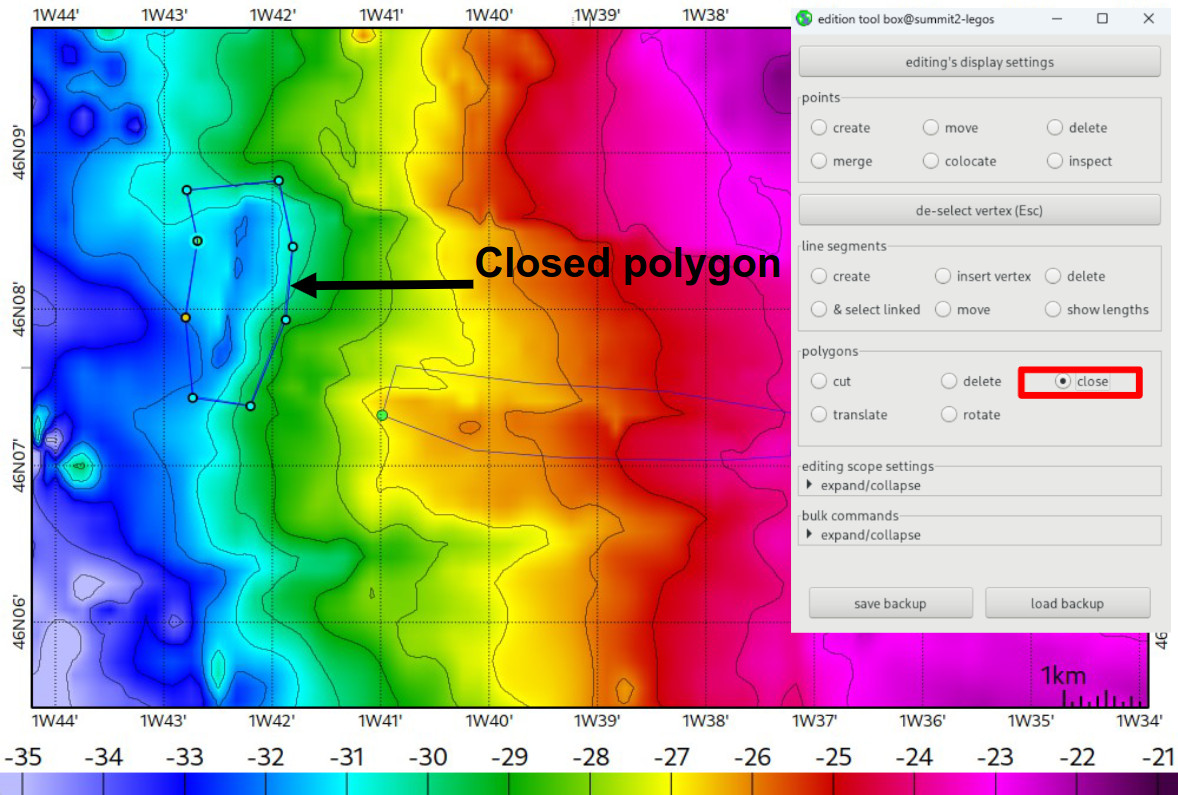
Next, click on the last point you created, then on the first one. The polygon should now appear as “closed”.
WARNING: Do not forget to save your file before leaving the edition mode !
Looking into the polygon files, you should get a first line with the index of polygon and the number of points, then the list of (longitude latidude) points. Example:
$> cat smooth_1.plg
1 7
1    -1.7141200    46.1456800
2    -1.6979500    46.1468000
3    -1.6947500    46.1400300
4    -1.7031100    46.1248100
5    -1.7096900    46.1231400
6    -1.7127000    46.1347600
7    -1.7141200    46.1456800
Step 2: Smoothing
We will use topo_smooth. First, you can use this command:
topo_smooth -p smooth_1.plg \
            --filter=median \
            -r 0.1 \
            -b ../2-integrating_xyz/GEBCO5arcs_MNTAtlSHOM_S202001000.nc \
            -f netcdf \
            -o GEBCO5arcs_MNTAtlSHOM_S202001000_smooth01p1.nc
Options used here (see topo_smooth for more):
Name |
Description |
|---|---|
-p |
polygon used for smoothing |
–filter |
type of filter (median or loess) |
-r |
radius used to apply smoothing (in degrees) |
-f |
output format |
-b |
working bathymetry |
You can make multiple trys with -r option to get the expected result; be careful to change the name of the output file each time. To apply successively polygon files, don’t forget to modify your working bathymetry to the already smoothed one.
Here is an example after smoothing with -r = 0.01 for “smooth_1.plg” and -r = 0.005 for “smooth_2.plg”, with these commands:
topo_smooth -p smooth_1.plg \
            --filter=median \
            -r 0.005 \
            -b ../2-integrating_xyz/GEBCO5arcs_MNTAtlSHOM_S202001000.nc \
            -f netcdf \
            -o GEBCO5arcs_MNTAtlSHOM_S202001000_smooth001p1.nc

topo_smooth -p smooth_1.plg \
            --filter=median \
            -r 0.01 \
            -b ../2-integrating_xyz/GEBCO5arcs_MNTAtlSHOM_S202001000.nc \
            -f netcdf \
            -o GEBCO5arcs_MNTAtlSHOM_S202001000_smooth001p1.nc