Interactive vertical slicing (View window)
Forthis example, open the 3D file GLORYS/dataset-ibi-reanalysis-phys-005-002-daily_apr-jun2014.nc.
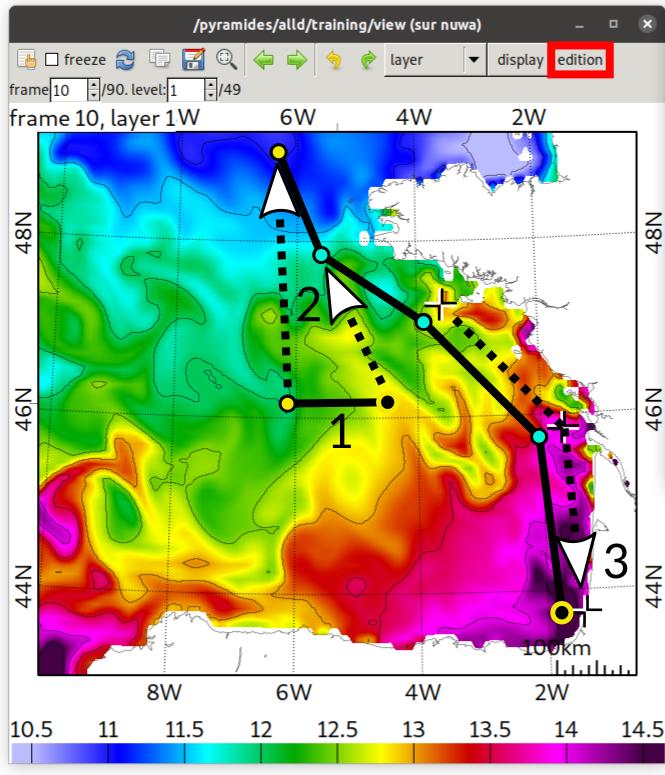
1. Create the slice:
edition → scripts → new polygon1 [S] and name the new variable that will contain the coordinates. The edition tool box window appears automatically (otherwise edition → edition tool box…).
2. Move the slice:
edition tool box window → vertices/points → move, then View window → [Right click] to pick the vertex + [Right click] to drop it.
edition tool box window → polygons → translate (or rotate) to move the entire polygon.
3. Create new points (optional):
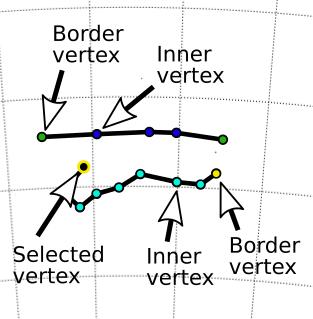
edition tool box window → vertices/points → create, then View window → [Right click] to add the new vertex.
WARNING:
To create new vertex, the selected vertex need to be a border vertex (the creation of a new vertex will connect it to the selected one).
4. Display vertical view:
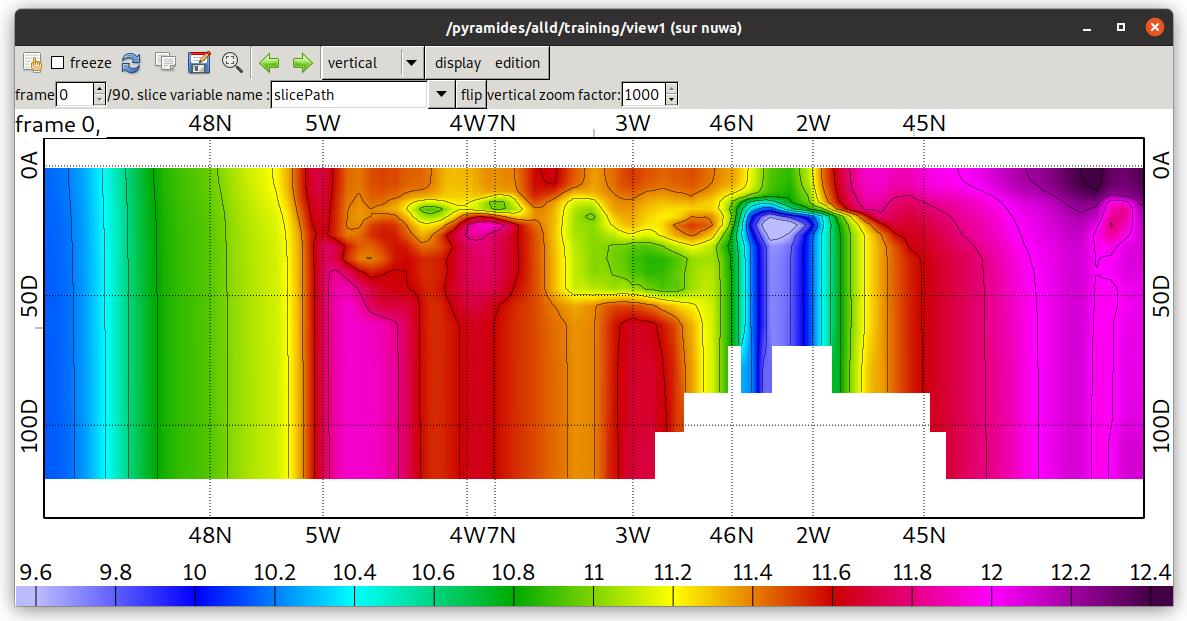
View window → display → scripts → new vertical view [V], then adapt the vertical scale using move and zoom methods. On the vertical scale, 10D refers to “10m deep” and 10A to “10m of altitude”.
5. Change the slice:
Use the moving methods to change the location of the slice and it will automatically recompute the corresponding vertical view of the slice.